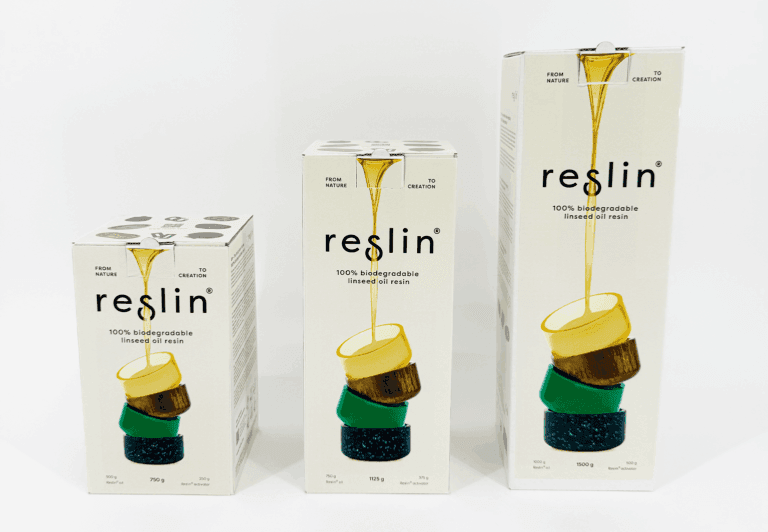
What is Reslin®?
Discover the power of linseed oil and a natural activator made from sugar beet molasses – together they form Reslin®, a biodegradable, natural resin that’s revolutionizing the way we create.
Unlike traditional epoxy resins, Reslin contains no harmful substances, no solvents, and no toxins. It’s a safe, sustainable, and eco-friendly alternative that’s gentle on both you and the planet.
Reslin is easy and creative to use, perfect for crafting decorative, functional, and artistic pieces. In just 60 minutes at a low temperature in a convection oven, your creation is fully cured and ready to enjoy.
Create naturally – with beauty, safety, and sustainability in every pour.
100% biodegradable
the sustainable alternative to chemical epoxy resin
Safe & user-friendly
no harmful substances, child-friendly and workable with bare hands
Time & cost-efficient
creations are ready quickly at low temperatures
Flexibility & versatility
suitable for both small and large objects, colors and textures can be freely combined
How to Reslin®?
Preparing the Reslin® components
It is very important to bring the Reslin® components to the right temperarture. Warm the Reslin® activator & oil in an oven during 20 minutes at 60°C (140°F).
Weighing the correct ratio
For the best results, it is essential to respect the correct ratio of Reslin® activator to Reslin® oil. This is 1 part Reslin® activator to 2 parts Reslin® oil.
Mixing
Stir the mixture carefully for several minutes. In this stage you can add additives to the Reslin® mixture like GlassRoxx, glass beads, mica powder, tint, natural elements, …
Mold filling
This way you do this depends on the composition of your Reslin® mixture. After filling the mold, let the mixture rest for 20 minutes before placing in the oven.
Heating the object in two phases
Phase 1: place your object in a convection oven and warm for 20 minutes at 90°C (200°F).
Phase 2: increase the temperature to 120°C (250°F) and warm again for 20 minutes.
Cooling & de-molding
After the second stage of heating, you can immediately proceed with cooling the object. Let you object cool off in the air or place the mold in cold water.
Explore the Finishes
Each Reslin creation is one-of-a-kind, and you can customize the look and feel in endless ways:
Mica powder
Tint
Neon powder
GlassRoxx / glass beads
Jesmonite terrazzo
Natural elements
StoneRoxx
How much Reslin® do I need?
Before you start, you need to know how much material fits into your mold.
Here’s the easiest way to find out:
Fill your silicone mold with water.
Weigh the water – this number is your water weight.Use the water weight to calculate how much Reslin® you need.
If you’re making a natural piece (no additives) or just adding pigment (mica powder/tint)
→ Divide the water weight by 3.
That total equals your Reslin® mix:
1 part Reslin® activator
2 parts Reslin® oil
If you’re adding GlassRoxx / glass beads or StoneRoxx
Multiply the water weight by 2.
From that total weight:
70% = GlassRoxx / glass beads / StoneRoxx
30% = Reslin® mix (made up of ⅔ Reslin® oil and ⅓ Reslin® activator)
If you’re adding Jesmonite terrazzo chips
Multiply the water weight by 1,5.
From that total weight:
50% = Terrazzo chips
50% = Reslin® mix (made up of ⅔ Reslin® oil and ⅓ Reslin® activator)
Tip: Always mix your Reslin® components thoroughly before adding any pigments or decorative elements for an even, beautiful result.
FAQs
What do I need to get started with Reslin®?
Reslin® activator & Reslin ® oil
A silicone mold
A convection oven
A mixing bowl
A spatula or stirring stick
Any additives such as GlassRoxx, color pigment, or other creative additives or your choice
Can I use the original packaging to heat up my Reslin®?
Yes, you can put plastic Reslin® bottles in the oven to warm up as this should be done at low temperature (60°C).
This also makes it easier to weigh out the right amount of Reslin® that you need for making your object.
What is the ratio of the Reslin® components?
Always use one quantity of Reslin® activator for two quantities of Reslin® oil. The ratio is therefore 1 to 2.
Is Reslin safe to use indoors?
Yes, Reslin® is a low-odor, solvent-free material that’s perfectly safe for indoor use.
Do I need to use an oven to cure Reslin®?
No, you don’t have to! You can simply let your piece air dry, it will naturally harden in 24 to 48 hours, depending on temperature and humidity. If you prefer a faster result, you can cure your creation in a convection oven at a low temperature. In just 60 minutes, your object is fully hardened and ready to use!
Can I use Reslin® for hot drinks or candles?
Hot drinks: it is not recommended to pour hot drinks into a Reslin® object, as the heat may affect the structure.
Candles: Reslin® is not suitable for candles, as the flame may cause the material to burn.
Why do I have sticky spots on my object?
Sticky spots can occur when the Reslin® is not mixed properly. This can lead to residues of the Reslin® activator forming strings and not being fully activated.
Can all silicone molds be used for Reslin®?
Yes, all silicone molds can be used for working with Reslin®. But depending on the type of silicone mold that you use, your object may have a satin or a matt finish after demolding.
Can I add different additives to the Reslin® mixture?
Yes, you can add different materials to the Reslin® blend, such as:
Pigment powders, alcohol ink or natural mica for colour.
GlassRoxx® or Reslin® glass beads for texture and extra colour.
Jesmonite flakes, coffee, herbs, dried flowers, spices and even for unique effects.